
In a previous post, I mentioned in passing my giddiness over the successful replacement of our old sprinkler system controller. In case anyone else is contemplating doing something similar and has a bit of trepidation about the task, let me share my experience and perhaps give you some encouragement.
I had toyed with the idea of replacing our 20-year-old Hunter sprinkler controller but every time I got serious about it, the myriad choices were too intimidating. The Hunter was old and clunky and decidedly analog, but it worked…right up until the time when it didn’t.
About a week ago, our sprinkler heads started popping up at random times and in random sequences, never shooting out water more than two or three seconds at a time…not necessarily a disastrous situation, but still a clear indicator that it was time to get serious about a replacement. So, I once again dived into the research.
I was leery about the new-fangled, so-called “smart controllers,” most of which are controlled remotely via a phone, and many of which can be controlled by other “smart devices” such as Alexa, Siri, and your intelligent combination can opener/sous vide cooker/bug zapper. All of them promised to take over the dreary chore of deciding when how much water would be deposited on your yard and flower beds, based on “hyperlocal” weather conditions and forecasts. I have absolutely no faith that any of that is actually accurate and effective, but since my Luddite world is rapidly collapsing in on itself in every other respect, why should my sprinkler system be any different?
So after intensive online research, I decided on the Rachio 3 controller. Sure, it has all the bells and whistles I was skeptical of and had no need for, as we’re under a strict two-day-a-week watering schedule, and then only during a limited number of hours on those days, so using a variable schedule is out of the question. But it also has a set-it-and-forget-it routine specifically designed for such mandated schedules, which I suspect most of Texas has implemented.

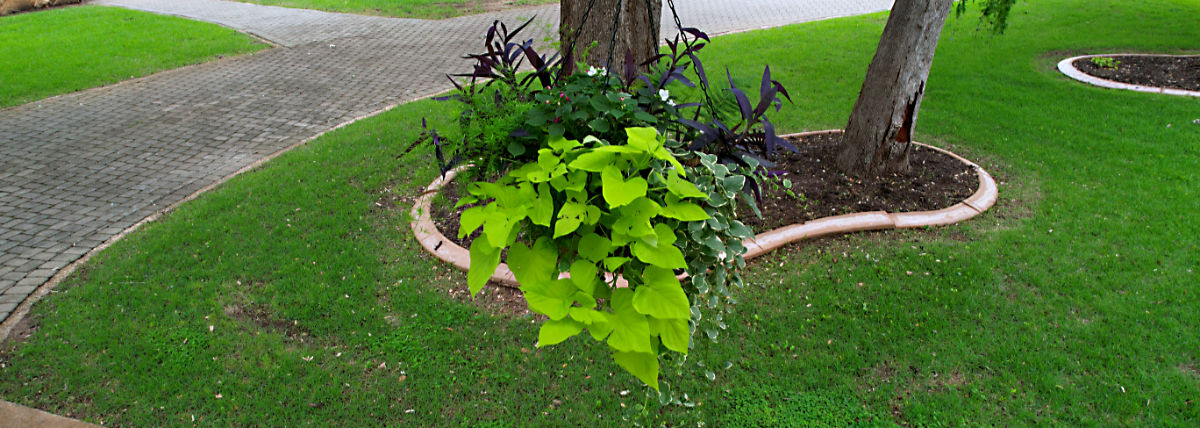
Our system has eleven stations (9 turf stations and 2 flower bed stations), so I had to go with Rachio’s 16-station controller. I don’t foresee ever expanding our system, but the option is there if we do need it.
I ordered the controller via Amazon and had it in hand two days later. I was still a bit insecure about the undertaking so I elected to let the old controller stay in place until after the next watering cycle. The following morning, I steeled myself and waded into what I hoped was a shallow puddle and not a deep cesspool.
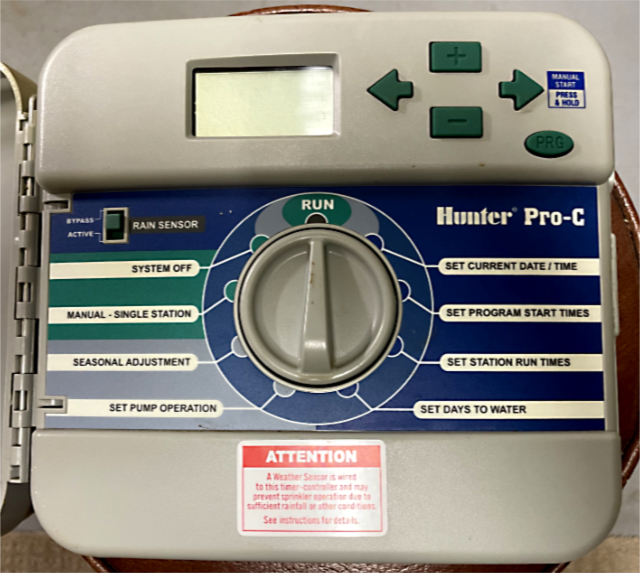
The second order of business was to remove the old unit. The FIRST requirement was to document the wiring setup. Every station has a different colored wire, except there are some connections that accommodate multiple wires of the same color. That had me a little worried, but those worries proved to be unfounded.
I printed the following photo for later reference.
Disconnecting the wires was not a problem, requiring only a screwdriver. I did have a brainstorm that later proved to be helpful: some of the wires were similar enough in color that my mild colorblindness could be an issue, so as I disconnected each wire, I used a Sharpie to mark which station it went to…one mark for station 1, two marks for station 2, and so on.
Once the wire were disconnected, I removed the entire unit from the wall and set it aside, just in case I had to put it back in service after the inevitable disaster that most of my DIY projects become. I then mounted the new unit.
Rachio provides a helpful template for positioning the three mounting screws, and for making sure the controller is placed in a spot that allows easy connection to all the wiring. It was a very simple task to complete. I then started reconnecting the wiring.
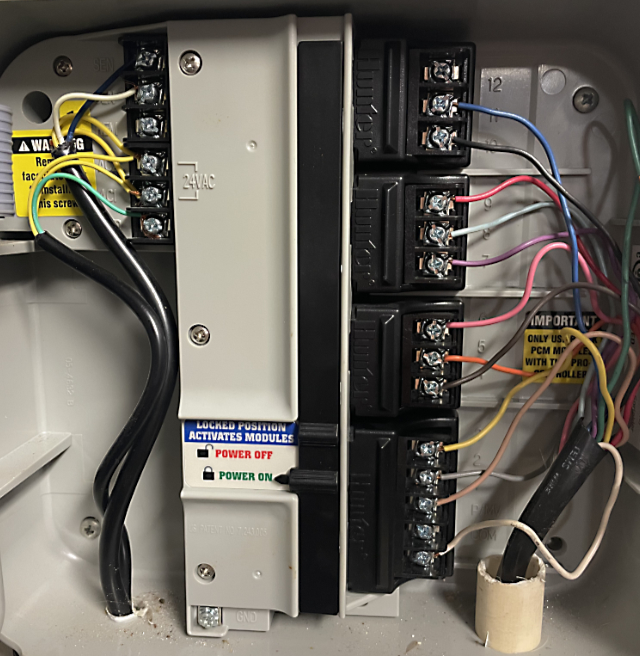
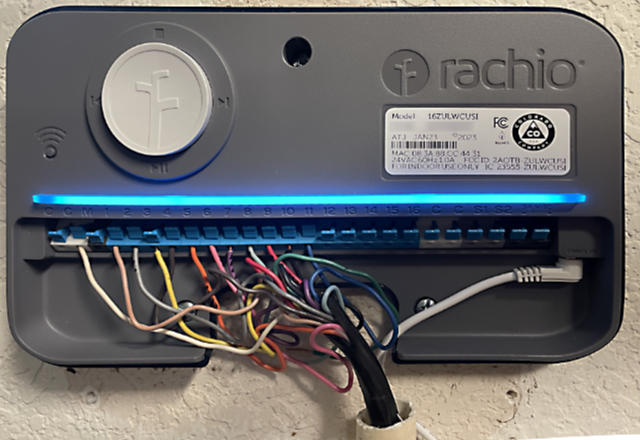
As it turned out, I didn’t need any of the wiring shown above on the left side of the old controller; they all related to accessories that I didn’t replace (and which didn’t work anyway). Connecting the required wires to the new controller was tool-free. It uses the “push down/insert wire/let go to secure” method that many A/V speaker systems now employ. I got all the wires in the right place on the first try, thanks to my drop dead simple marking (my laser printed photo muddied a couple of the colors just enough to confuse me). I did have to strip a tiny bit of the insulation from a couple of the wires to ensure a tight connection, but that was easy. Here’s what the new setup looks like:
The faceplate is held in place by magnets…easy off/easy on, but it does require the wiring to be flattened in an aggressive manner so that the cover fits snugly.
All of this was accomplished in about twenty minutes or so, but the real test was yet to come: getting the controller online and all the stations configured.
In a rare moment of intelligent preparation, I had already downloaded the Rachio app to my phone and set up an account. I had also taken a photo of the area of our yard serviced by each station (or “Zone” in Rachio’s terminology). You have the option of uploading those photos to the app and thus have a visual identity for each zone. You can also input text labels for each zone.
Connecting the controller to our wifi was pain-free and instantaneous. The controller even picked up the password from the app (your phone and the controller must be connected to the same wifi network. We have three. Don’t ask.).
Configuring each zone is a bit tedious, but it’s also an easy to follow guided process. The app requests data in a series of categories: type of plant being watered (e.g. grass, shrubs, trees, flowerbeds); type of lawn (e.g. warm weather or cool weather turf); hours of sunshine or shade during a typical days; slope of the zone, if any; type of sprinkler nozzle (e.g. popup spray head, rotor, etc.); type of soil (e.g. clay, loam, sandy, etc.). All of these variables allow the app to determine the optimum watering schedule when combined with the weather conditions and forecast.
I went through this process for each of the eleven zones and at the end, the app gave a suggested schedule, which I immediately overrode by selecting the option for “mandated watering schedule.” It then allowed me to select which days of the week to water, and what time of day to start the watering. Our days are Thursdays and Sundays, and I start the watering just after midnight on those days to minimize evaporation due to heat and wind.
Even with this manual schedule, the app suggests run times for each zone, which you can override if you wish. My initial impression is that it is being more liberal with the watering than I like, especially given the price we pay for city water, but I’ll go with it for a while and see how painful the next couple of monthly bills are.
The Rachio controller does offer the ability to manually run individual stations via the large button on the controller. You can also do this via the app. The app tracks data such as the last time each station ran and how long it ran, and whether there were any weather-related skips. In that last regard, you can specify various scenarios in which the system doesn’t run…for example, when a freeze is forecast, or excessive wind is in the offing. I’ve got mine set up to skip if it rains 3/4″ of rain or more, or if winds exceeding 20 mph are forecast. You can also specify the source of the weather information, including if you’re operating your own weather station.
After all was said and done, I was quite satisfied with the installation and configuration. Rachio has made simple what could otherwise be a daunting task, with a product that’s well-designed, and documentation that’s thorough and clear. Their app is excellent, one of the better I’ve seen in the automation genre. I don’t have a lot of mileage with this new device, but for now, I’ll give it a strong recommendation.

But wait…there’s more! While looking for a way to register the controller for warranty purposes (which I never found, but then I realized that all the relevant information was captured via the app during installation), Rachio tipped me off to the possibility that I could qualify for a rebate from our local water utility. The Rachio website offers a search capability based on zip code to display available rebates. When I input our zip code, I was informed that our water utility offers a rebate of 50% of the cost of a smart controller, up to $100. I hopped over to the utility’s website and filled out an online form, and if and when it’s approved, I’ll score a sweet Benjamin out of the deal! It’s not life-changing, but it’s also not nothing.
Discover more from The Fire Ant Gazette
Subscribe to get the latest posts sent to your email.