
I bought an LED TV as a Christmas present for MLB as a replacement for the remaining CRT set in the house. That TV was installed inside the built-in cabinets in our workout room, mounted on a sliding metal platform that has a few degrees of rotation so that we theoretically could view it from anywhere in the room. In practice, however, the platform didn’t extend far enough to clear the open cabinet door, and part of the screen was blocked from the view of someone on the treadmill. This was frustrating, especially to you-know-who. I fully realize that this might represent the ultimate first-world problem, but that’s the way we roll.
The goals in replacing the old TV were to upgrade to a high-def, non-pan-and-scan picture as well as to place it so that we could see the entire screen from any point in the room. The latter would be a challenge, though, as the construction of the cabinet and its doors meant that not just any mounting bracket would work. I needed something with a relatively long extension but that would still fold flat so that we could close the doors when the TV wasn’t in use.
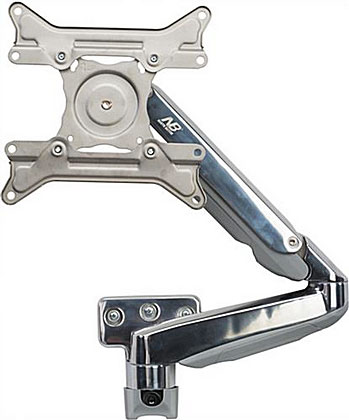 I found what looked like an ideal solution on a website for Displays2Go, a “full-motion” tilting, swiveling, extending articulating arm mount that uses a gas strut for smooth and adjustable action. It also looks like something out of a Pixar animated short.
This mount extends up to 23″ from the wall, the longest reach I found in a configuration small enough to fit inside our cabinet. It also allows 360º rotation, which I assume might be useful if you lay on your side while watching TV.
As an aside, this mount is manufactured by a company called North Bayou. In the time-honored Chinese tradition of stealing being intellectually influenced by American business innovation, that company’s logo is suspiciously similar to that of New Balance. Nevertheless, the quality of their product is indisputable.
I mentioned earlier that I had installed a sliding platform for the previous TV, and this was to be an integral piece in my plan. Even though the mount had a long reach, it still wouldn’t have been enough by itself to clear the cabinet door. My plan was to somehow attach the mount to the sliding platform, so that the combination of both would achieve the goal. The challenge was figuring out how to do this.
It turned out to be a relatively simple matter. I would sandwich a board vertically between two pairs of metal L-brackets which would in turn be bolted to the metal platform, forming a wall of sorts to which the mount would be secured. A key factor in this approach was the fact that the TV – a 32″ Samsung – weighs only eleven pounds (another side note: it replaces a 60-pound TV), so I didn’t have to worry about whether this mounting system would be sturdy enough.
So, I bought a 1/2″ slab of pine at Lowe’s, along with the required L-brackets, and put my plan into place. It took some cyphering to decide on the right placement to ensure that everything fit in the space and cleared the doors, open and closed, but the actual fabrication went pretty smoothly. The installation? Eh, not so much. Can you spot the problem below?

This would have been perfect had I (1) been planning to watch TV from outside the house, and (b) had X-ray vision. Neither of those things really fit our lifestyle. In my defense…well, I’m an idiot. We’ll leave it at that.
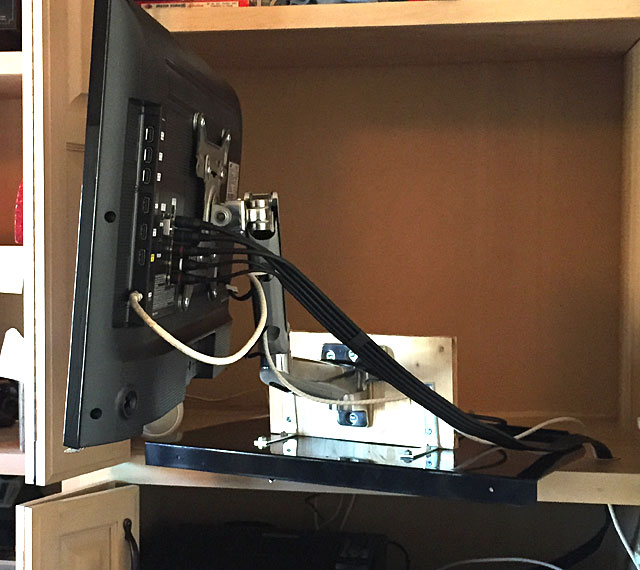
Following a couple of hours and an extended workout of my vocabulary, I got everything pretty well in place. Here’s how the setup looks with the TV extended:
The TV went onto the mount with a minimum of fuss, but I discovered that two of the mounting bolts are apparently designed to be burglar-resistant. I hadn’t gorilla-tightened them but when I tried to remove the TV to fine-tune the setup, I was afraid I was going to have to drill out the mounting bolts. For whatever comfort it provides, no one is going to waltz in and heist our TV with nothing but a pocket knife.
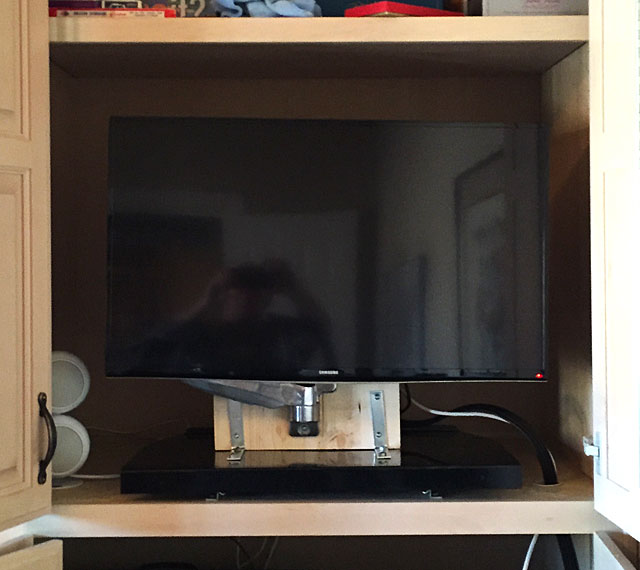
This is how it folds up to fit inside the cabinet:
At some point, I’ll put a coat of black paint on the board and brackets to prettify it up a bit.
The other complicating factor in this whole setup was that all the connections on the TV are on the right side, which of course is the furtherest from the cabinet when the mount is extended. I had to drill another hole in the shelf to route the cables closer to the set. The upside is that it gave me an excuse to use a Forstner drill bit, which is so much more efficient than a run-of-the-mill hole bit. I also had some leftover Mockett desk grommets to finish out the hole (I highly recommend their products).
Cable management will be a bit cleaner once we get a Tivo in that room and I can replace the component A/V cables that connect the TV to our antique non-HD DVR with an HDMI cable. The DVR served us admirably for at least a dozen years, but I can’t remember the last time we burned a DVD in it, and the absence of HD is now a non-starter given the new TV. And I challenge you to find a non-technical, non-CIA blog post with a single paragraph containing this many acronyms.
I do recommend the articulating arm TV mount if you need the maximum amount of flexibility positioning a flat screen TV or monitor. Note the limitations though: max screen size of 42″ and max weight of 15 pounds.
Discover more from The Fire Ant Gazette
Subscribe to get the latest posts sent to your email.