
Alert Gazette readers will recall that many (most? all?) of my DIY projects either end up badly, or at best take a distressing turn somewhere in the process, requiring a significant recalibration and/or assessment of just exactly why I thought I was competent to achieve the task at hand in the first place. (For proof, just pick any post in this category.)
Since most of the crafty catastrophes occurred due to my delusions of adequacy, when Debbie offered to help me assemble the newly-arrived bookcase on Wednesday, I thought that perhaps accepting some assistance would break the Cycle of Despair and Disillusionment.
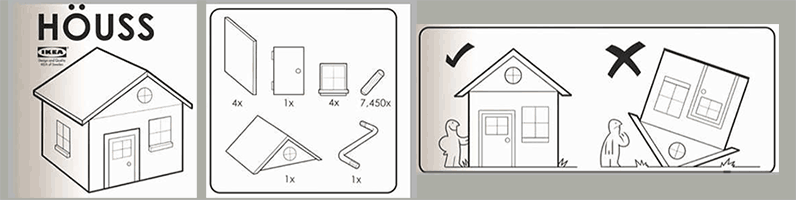
This particular bookcase followed the familiar IKEA pattern of wordless instructional iconography; here’s one of the eight pages of pantomime:
The Directions of Dubiety
The theory behind this approach is that such visual cues can be understood and implemented by third graders. In our case, however, there’s never a third grader around when you need one.
Anyway, the bookcase components — of which there were approximately 846, including those wonderful/horrible cam locks and binder posts (the latter is my own made up term; I’d give you a better one but of course the instructions, as I believed I’ve previously noted, had no words). The pieces were machined nicely and everything went together with a minimum of trouble and application of embarrassing vocabulary.
We tag-teamed the construction, and jointly perused the “instructions,” figuring that our two half-brains might equal one third-grader’s, and for the most part, we were right.
Most part. That’s a really troubling description, isn’t it?
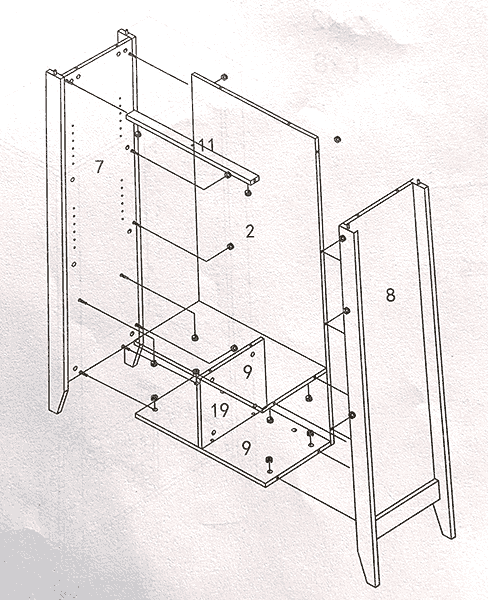
Now, this particular bookcase had one twist that I hadn’t hitherto encountered, as it has two drawers that obviously had to be assembled. Those drawers would then be inserted into the receptacles (I just googled them; they’re actually called “drawer boxes” and we’re all about cabinetry accuracy here at the Gazette), but only after the drawer glides (aka, “rails”) have been installed on both the drawers and inside the boxes. (The boxes, by the way, are labelled in the above disgraceful diagram as #s 9 and 19.)
The installation of the slides and drawers comes near the very end of the 68 step assembly process, and, of course, that’s where we veered off the road and into the Grand Canyon. Even though the diagram shows that the vertical piece numbered 19 has four holes drilled in it, thereby ensuring that it can be installed without regard to orientation, in reality, it had only two holes…and guess which way we didn’t install it? Yes, of course: the answer is the right way.
Now ideally this issue would be easily addressed by a minor disassembly leading to a flipping of #19, and a quick conclusion of the job. However, because of the way the cabinet was assembled, to do that would have meant either an almost complete teardown of the entire bookcase, or (I was tempted to suggest) sledgehammering the whole thing into kindling for use in the fireplace next winter.
Fortunately, cooler (albeit not smarter) heads prevailed and I decided that I could just drill a couple of new holes for mounting the slides, and no one would be the wiser.
As usual (again, see this category), I underestimated the complexity of the task and overestimated my competence in completing it. But with the help of a disconcerting number of tools, powered and otherwise, and a couple of false starts (fortunately all hidden with the dark bowels of the boxes), I was able to get the rails mounted in approximately the right places, and Debbie pronounced the end result good.
Strangely enough, I actually take some comfort in knowing in advance that all of my projects will inevitably require some recalibration (my euphemism for “fixing of a major screwup”); it really does relieve some pressure. And I’m happy to now have a partner in bungling, even if I can’t blame her for it.
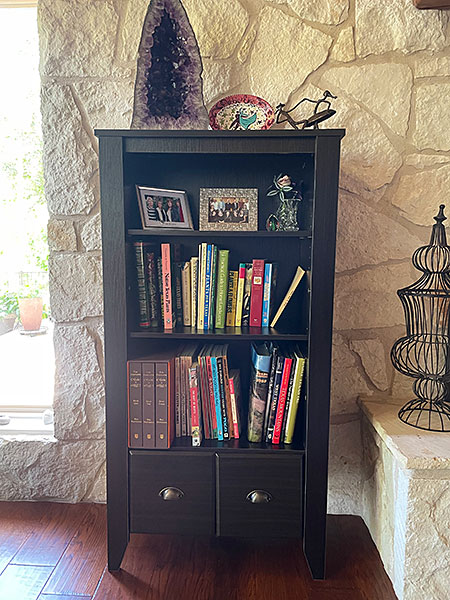
The newly assembled bookcase, locked and loaded.
Discover more from The Fire Ant Gazette
Subscribe to get the latest posts sent to your email.
You folks hid any mistakes. That is part of the secret to self assembly. Once you feel you reached something that would look good in a picture, node at each other. That is a mutual vow that no matter who tries to torture you into fessing up your mistakes, neither of you will squeal. Job done!
Uh, I’m afraid I’ve just squealed like a stuck pig, then. Fortunately, you’re the only person who reads this blog, and I know you won’t tell.
Right?
Right?
*crickets*
Very entertaining story! Congratulations! It looks great! I’m so fortunate to have Alan Fires, a very “Handy Man”. He seldom looks at those instructions unless he faces a problem. 😉 Lays all those out in categories and takes one section at a time. After reading your experience, I’m even more thankful. 👍