
Alert Gazette readers are accustomed to reading accounts of tragic outcomes for my DIY projects. Those outcomes aren’t always my fault – anyone can set fire to their own pants while welding – but, I’ll admit that I’m not really the most capable handyman. So, it gives me an inordinate amount of pleasure to report that I’ve recently had not one but three (!) victories in this area. Granted, none of them will make the Popular Mechanics Hall of Fame, but at least no burning clothing was evident.
Keyed Up
We recently inherited from my parents a beautiful and massive antique sideboard, which now graces our dining room. It has two pairs of locking doors that require skeleton keys to unlock. The keys also function as handles to open those doors.
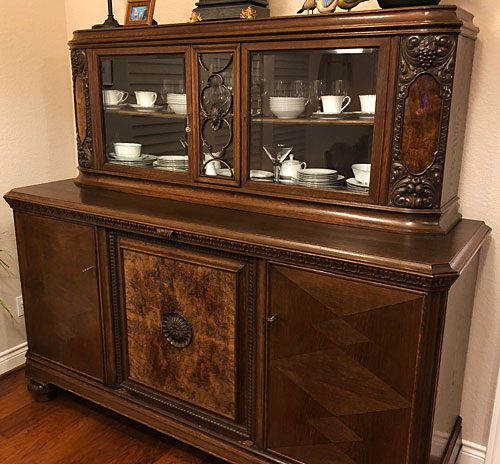
The sideboard had two keys of different sizes for each pair of doors, which was fine, but a bit inconvenient when we had to move a key from one lock to the other if we needed to get inside both doors. It would be great to have a second key for the set of doors we used most often.
The last time we were at my parents’ home, I ran across an orphan skeleton key in a desk. Could it be that this was a missing key for the sideboard? I was excited to check when we got back to our house.
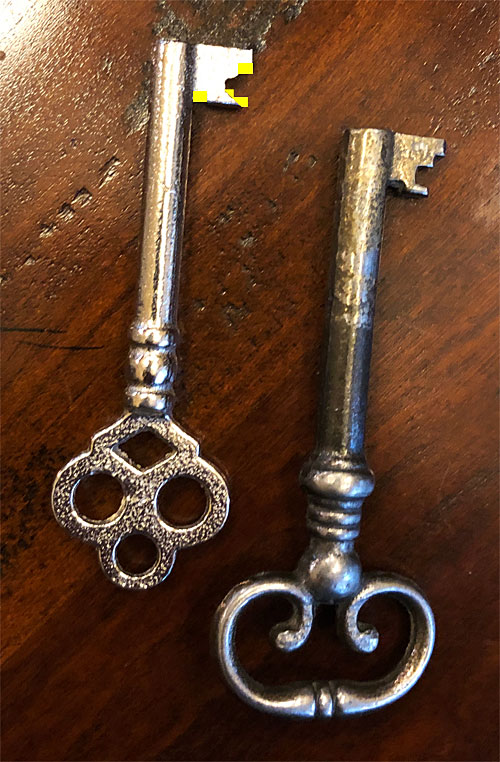
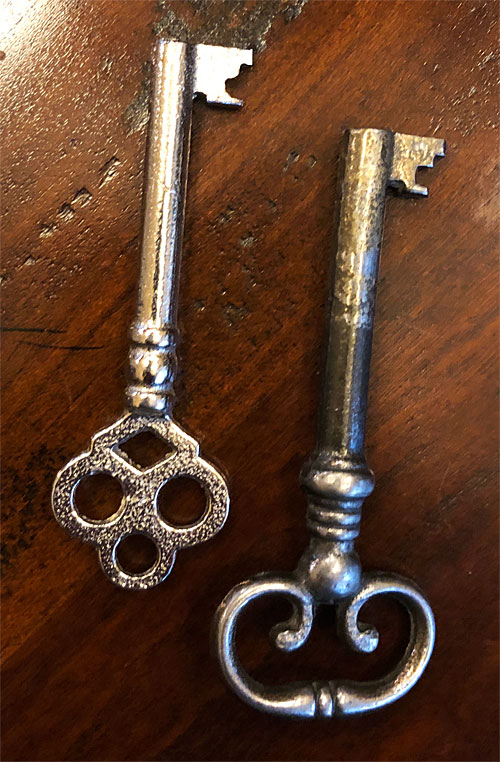
Unfortunately, it wasn’t even close to fitting the lock. But as I compared it to the original key, I noticed that the barrel of the new key was identical to the old key, and the bit (the flat part that slides inside the lock) was similar…but where it differed, it did so because it had too much metal. That was key (pun intended) to my plan: metal can always be cut away. I figured that a steady hand and a Dremel tool would be all that was needed to create a duplicate key, and I had one of those things.
Fortunately, most skeleton keys and their locks are not precision instruments, and as with horseshoes and hand grenades, close is good enough. After a cut here and a grind there, we ended up with a second key that does the trick.
Below is a before-and-after comparison of the new key (shown on the left). The yellow shapes on the bit of the key show how the original key looked before I worked on it. Drag the vertical yellow bar to the left to uncover the modified bit.
It does occur to me (after the fact, of course) that somewhere there’s a lock that’s now missing a key. Oh, well. We’ll burn that bridge when we get to it.
Unwarped
Buoyed by that incredible display of knowledge, skill, and blind stupid luck, I shifted my attention to another critical task: removing the warp from one of the wooden doors on an armadillo trap.
Shortly after receiving a second trap from The Armadillo Trap company, one end began to develop a noticeable warp. After about a month, the warp progressed to the point where the door would no longer drop into place, and a trap with a permanent open exit is basically just a fun house for animals. I contacted the company about getting a replacement door (they sell them but I didn’t think I should have to pay for their manufacturing defect), and in a show of remarkable customer non-service, they never responded. I took matters into my own hands.
It’s a proven fact that that which can be warped, can be unwarped. Possibly. I just made up that fact, but I’m pretty sure it might apply to things made out of wood. Possibly. Anyway, armed with that made-up fact, I filled a pan with water, put the door into the water, and placed a 30-pound weight on top of it, centered over the warp. I left the door in the water for 24 hours, then removed it. The warp had straightened somewhat, so the next step was to complete the process.
I fastened a couple of short lengths of 2×4 to the door using large C-clamps and left them on the door for another 24 hours. At the end of that time, the warp had been removed to the point where the door now functioned as it should. So, the aforementioned made-up fact is, in fact, a real fact…at least where armadillo trap doors are concerned.
Secured
We live in a small, gated neighborhood, in a town with a crime rate so low as to be basically non-existent. To my knowledge, there’s never been a break-in in the history of our neighborhood. So, obviously we need a security system…according to someone in our household, who shall remain nameless (but whose nom-de-blog starts with an M, ends with a B, and has an L in the middle).
I resisted as long as I could, but despairing of ever again having a home-cooked meal I finally relented and agreed to try out a system from SimpliSafe, the DIY security folks. I used their website to configure a system for our house, with the total coming to just over $500 for the equipment. However, since everybody spies or eavesdrops on everything I do, shortly after configuring the system I was notified of a 30% discount (there’s a 50% “Black Friday” discount today!), and with that plus some credit card perks, I snagged everything for around $35 out-of-pocket.
 The shipment arrived a couple of weeks later (hey, SimpliSafe guys…check out Amazon’s delivery system, how ’bout?), in a rather small box filled with even smaller boxes. The system consists of a base station that connects to your wifi (if you have one; it uses a cellular connection in the absence of wifi); a keypad that connects to the base station; and multiple types of sensors that also connect to the base station. Ours included multiple door sensors (we have seven exterior doors, not counting garage doors), glass breakage sensors, motion detection sensors, a camera, and an extra ear-splitting siren guaranteed to deafen any bad guys who have the misfortune of opening the wrong door at the wrong time. (We will also probably suffer heart attacks, so it’s a wash.) You can also get sensors for water leaks, fires, and windows.
Setup and installation was figuratively a piece of cake, with one minor exception. Each sensor must be recognized by and connected to the base station. This should be as simple as selecting the sensor type in the SimpliSafe app (did I mention that you need to install an app on your phone or tablet for easiest installation?) and then pressing a button on the top of the sensor. In a perfect world, the base station immediately identifies the sensor and tells you in an Alexa/Siri/Google Assistant-like voice that it’s cool with it, but in my case, it never did and so I couldn’t tell if the sensor was activated or not. I didn’t know how long to press the sensor button, and if my button-pressing duration was insufficient or too long or too wimpy or what.
Fortunately, even without the vocal feedback from the sensor, one can check the connected sensors section of the app and the serial number of each connected sensor will appear. So, here’s Installation Tip #1: keep each little sensor box because it has the serial number on the outside; it’s a way to verify which sensor has been connected, if you and the base station aren’t on speaking terms. You can then use the app to rename the sensor, to something like “Doorway to the 5th dimension” or “Window in the hellion’s room” or whatever is most applicable to your mindset. I tended to the less imaginative labels such as “master bedroom” and “front door,” but that’s just how I roll.
Note: I later ordered a couple of additional sensors and the sensor-to-base-station connection worked flawlessly, in that as soon as I pressed the button on the sensor, the base station told me in no uncertain terms that we were in business. Still not sure what happened with the original installation, although we were having some minor wifi issues at the time.
Sensor installation is straightforward. Each one comes with mounting screws, but they also have built-in adhesive strips if you’re wary of commitment or just don’t want to drill holes in throughout your house. All sensors, cameras, and keypads are wireless; the only thing that’s plugged in is the base station. Make sure you have plenty of CR2032 coin batteries on hand…they are the Official Power Source of Security for SimpliSafe (and while all sensors ship with batteries, several of our door sensors came complete with “low battery” warnings).
If you’ve had any kind of monitored security system before, the SimpliSafe operation will be completely intuitive. Set up a four digit disable code, create a safe word for false alarms (ours is fir…ah, you almost caught me, didn’t you?), and press “home,” “away,” or “off” buttons depending on whether you’re hom…well, you know. The $15 per month remote monitoring provided by SimpliSafe is optional, but if you’re gonna have a security system, you might want to have one that’s actually, you know, *secure*. And the “no contract” month-to-month, cancel-at-any-time monitoring arrangement is much more homeowner friendly than pretty much any other service out there.
Our system has been in place for about a month and I’m disappointed to report that we haven’t yet experienced a break-in. Well, not counting the time I walked out the door one morning without disarming the alarm. #learningcurve
Discover more from The Fire Ant Gazette
Subscribe to get the latest posts sent to your email.
Very impressive work! Has the trap door warped back to its pre-soak shape?
Not yet, but I have a 60 pound anvil standing by…just in case.
The sideboard sure is beautiful! Praying that you all have a wonderful Thanksgiving. We miss you.
Thanks, Gene! Many blessings to y’all as well.